How this Married Woman got her Boyfriend Back

Last year I posted about how I had a husband but really just wanted a boyfriend. You can read about it here.

Several people asked if we figured out how to fix it to let them know. So here is what I did, we did, to get our girlfriend and boyfriend back.

First, we didn’t sit down and discuss our issues in detail. We didn’t draw up a game plan. We didn’t research ways to spice things up. We didn’t plan regularly scheduled alone time. All the changes that took place over the last 8 months have been completely made by each of us of our own accord. I don’t even know if he intentionally made any of these changes. He may have worked hard to practice them or he may be playing off of my actions.  I don’t care to know. We are both happy and that’s all that matters to me.

  1. Change your definition of a date. EVERY article I stumble upon stresses the importance of date nights in marriage.This idea sounds lovely and I truly wish this was feasible. This hard pressed “fact of a healthy marriage” had me already set up for failure. I knew this wasn’t an option and in fact we haven’t had a single date night since our train wreck of a date back in December. We have had one night alone since then (8 months ago) in which he slept the entire evening and I caught up on work. Now we define a date as leaving the house together, even with kids, to do something out of the ordinary. Movies, restaurant, zoo, the park, even riding around looking for pokemon has become our “dates”. Why do kids have to change that? My kids are seeing their parents in love, holding hands, being affectionate, and doing so while being parents. I can’t think of a better thing to teach our kids than how to treat their partners in marriage. We started killing two birds with one stone when we changed the definition of date night.
  2. Comprehend. Other articles will list this as “listen to one another” but that is such a basic and common sense suggestion. It is easy to listen. I have always listened to him. Now I comprehend. I listen, ask questions,  engage. He does the same which I felt was my biggest complaint with him before. When he talks about a coworker I don’t know, I ask “who is that?”. When he tells me about a job that frustrated him I ask exactly what part of the job was difficult. The vast majority of my friends live behind a computer screen; he knows next to none of those people. When I talk about a friend he doesn’t know he asks “Who is that? What group are they from?”. He now knows my admin team and knows the people I work for. When I prattle on about a difficult customer he offers his input/advice where he use to reply with a “f*** ’em” which is code for “I don’t really care”. This one simple change in conversation turns what use to be passing small talk into full engaging conversations between us.
  3. Stop nagging. This is pretty straight forward. This doesn’t mean let everything slide and never argue; it means change your approach. When he would say “I’m tired of this d*** bathroom counter always being cluttered with your sh**” I immediately didn’t want to clean it. Nobody likes to be forced into anything. He says “I wish you’d clean this mess” but what I hear is, “You don’t care to clean up after yourself. I have to tell you to do everything. You don’t care about my happiness. I must treat you like a child to make you do anything.” Nagging infuriates me to no avail!!! Now, he asks like so, “When you find the time, do you think you could find a home for all your makeup?” This simple change in tone and words changes everything. Now I hear “I know you are busy so may not be able to get to it as fast as I would like, but it will make me happy when you do.” Now I WANT to do it because I want to make him happy, besides it’s such an easy task. Most things people nag about are very utterly basic and simple mundane chores anyway; the approach just makes us want to do it less.
  4. Simply be together. With two kids this is the hardest one for me, but so worth it. Before children we did everything together. Run to get groceries? I’m riding. Run to the corner store? I’m coming. Since kids we find it so much easier to send one while the other stay back with the littles. We still do time to time for very short runs but whenever the trip will take more than 20 minutes, I make the effort to go anyway. That means dressing kids, fixing sippy cups, having diapers and wipes, etc., but we are spending time together. We are spending time together without kids jumping all over us, because they are strapped safely into their carseats behind us.
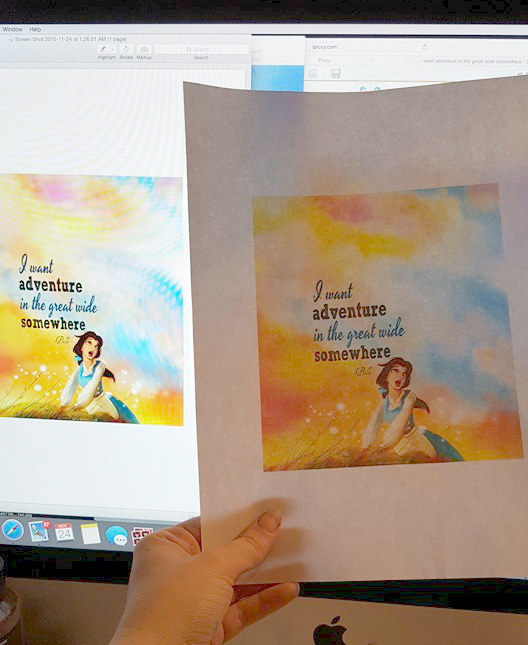
  5. Support the others decisions. Another common suggestion, I know. When I said “I’m going to spend two months painting these tiny painting for a tiny itty bitty profit that doesn’t even cover my labor because I simply want to do it” his response a year ago would have been “You waste your talent. You will never be able to run a real business” This year he said “Awesome! You got accepted? That’s cool. How does this whole thing work?”. He bought a Chevelle project car, sure the money could have went elsewhere and it’ll take a lot of time and more money to get it in the shape he wants it, but I do not care. He’s happy, ecstatic even, and I couldn’t be happier for him.
  6. Have fun and be youthful. For us this means car karaoke, jamming to the oldies, harassing our friends together on snapchat, playful butt grabs when he walks by, corny jokes, and terrorizing our kids like annoying older siblings. Be playful, be a kid again, life shouldn’t be so serious! Seeing him act silly immediately puts me in a happy mood and my love for him grows every time he makes me laugh.

OH! And sex? Not a priority anymore. It happens when we want and not just when we find the time. Treating it as a want and not a need has improved it by leaps and bounds in both frequency and satisfaction. Yet another How to Save Your Marriage rule debunked!

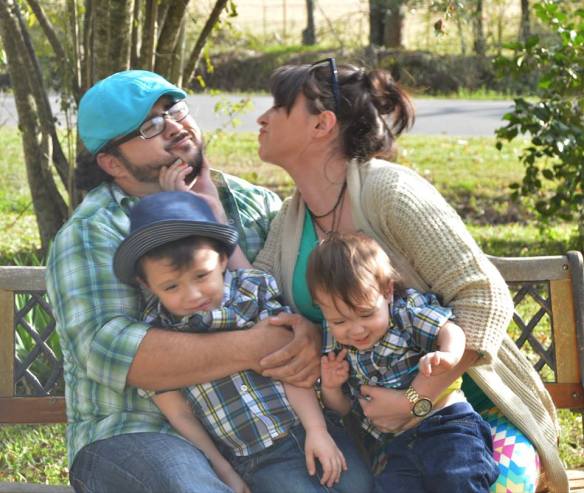
I know it doesn’t seem like some great epiphany, but y’all asked me to tell y’all when I found what worked. These may not be the answers for everyone, but I have never been happier in love. Corny? I don’t care, I see enough of y’all complaining about marriage on Facebook that I have earned my 5 minutes of happy brag time. Besides, I just realized we haven’t taken a photo together since our date 8 months ago, I’ve so earned this blog post.

Now…. if we could just get a date night do over.

12289588_1033012680054047_1735558222519359858_n.jpg12316114_1033012683387380_126338734768904886_n.jpg


A Message to the Church

051d31f5a150e49717eb5b8e7fdb9374faebb2-wm.jpg

I am visibly tattooed

Half my head is shaved

I have a piercing through my lip

I wear makeup

I wear pants

Given all these items listed above you are not imagining a Pentecostal woman. I’m here to surprise you though, for at the very soul of my spiritual foundation lies a cornerstone of Pentecostal Apostolic beliefs. Before you run away and think this post wont apply to you or your denomination I assure you, yes, this message applies to all of us. Though your religion may not have the same standard you expect of Pentecost, every religion has it standards.

A few weeks ago I volunteered to help out at a friend’s Pentecostal children’s vacation bible school. I expected I would show up, corral kids from point A to B, maybe serve food, basic parenting volunteer stuff. I bought some skirts merely out of respect for the other ladies, just enough to get me through camp.  I was surprised to receive a text a week before camp was due to start asking if I would come in to help with decorating.

I knew this would mean moving, painting, ladders, and I am so out of practice with skirts I didn’t want to risk a wardrobe malfunction in the presence of complete strangers so chose to wear my pants. My piercing was also fairly new and could not yet be removed temporarily without risk of it closing up.

Day one. I know not a single soul I am meeting with. They know nothing of my pentecostal roots and I am fairly glad at first because the ultimate curse within this denomination is to be considered a backslider. It is the lowest insult you can be called. I DO NOT consider myself one in the least.

The lady I am to be helping is in every way visually “typical” of what you would expect to see on the church pew come Sunday. Each person I met throughout the day continued to reassure me I was out-of-place. I had a feeling after this day I would not be getting called back the next to help. I felt surely they would find somebody to fill in and suddenly not need my services so much. I wasn’t the face you would want attached to your church program.

I have seen a lady pulled out of the middle of praise and worship and asked to remove her earrings in my childhood church. My own mother had her wedding band “rebuked” after forgetting to remove it after work. Mind you, this is all by the elder women of the church who we like to assume have all died out, but do we not learn from our elders? We follow their example right? Would I be treated with distaste for my appearance and not my heart?

Then…. nothing happened. The entire week, nothing. I was treated like any other member of the church. Nobody ever mentioned the blaring piece of metal hanging in my lip. Nobody asked why I had shaved half of my “beautiful head”, as others like to say. Nobody asked I put on a skirt to make them more comfortable. Even the older ladies of the church, who in my experience tend to be the most condemning, never once gave the slightest hint of discomfort. They each looked me in the eye when speaking to me and thanked me with true sincerity for my help.

I sank into myself a little when I was introduced to a member of the pastoral team, he never paused to give me a curious look, he shook my hand, thanked me, and continued about his activities. He made a point to know my name and thank me again later in the week, once again, never even pausing to question “Why does someone who looks like this want to help here?”

Camp started the following week where I continued to volunteer my help. During all this I begin meeting others who did not look “typical” of the church and assumed they were also volunteers like myself. No, they were members, members who had found the spiritual home they needed within this church.

Here is what I find the most amazing part of it all. During all these exchanges that took place over the course of those two weeks, not a single person ended our conversation with “You should join us for a service!” The only time it ever came up is when I, myself, asked about their service schedule.

You may be thinking “That is awful! What a missed opportunity.” No, this was the most beautiful part of the entire thing to me. Had any one person used that line after the kindness they showed I would have immediately disregarded their kindness for the church version of a sales tactic. Had any of them said this it would have also showed that they most likely assumed I didn’t attend church elsewhere, or that I needed God in my life because he was most likely absent.

Truth is I have a personal walk with God. It grew so much stronger after I left my previous small town pentecostal mindset.  A mindset where everyone is bad but those who look, walk, and act like us. I’ve seen it kill churches, kill families, kill relationships, stir hate, things not of the God I serve.

To be a christian means to be like Christ. We hear we must let him shine through us. That means exactly that. It does not mean beat your bible, your pick and choose version of verses, and your standards over the head of those you deem “not christian enough”. It means to serve, love, and treat the prostitute and the politician as complete equals in all aspects of your love and respect.

The congregation at the Pentecostals of Lee Road has shown me that I have to break the stereotype I was taught as a child that pentecost is an exclusive religion. I can not be embarrassed to tell people my religion for fear they would think I believed myself better than them. I CAN still feel welcome in a house of God where you truly feel his presence. I can worship freely without being “attacked” by well-meaning christians seeking to ‘pray me through’ because simply lifting my hands means I suddenly feel the need to change my entire life.

This goes for all of you. Baptist, Catholic, Presbyterian, Pentecostal, Non Denominational. Treat your visitors like your members. Don’t drag them to a service in guilt. You are not better than anyone. Show kindness, show equality, and let God handle the rest. Standard is not what will save your soul. Following your convictions will and God can handle those just fine.  If your church is full of perfect examples of your beliefes then it’s not a place where I want to be. It is obviously not a place of growth, but a place of routine.

I do not currently have a home church, but after the exemplary example set by the people of POLR, me and my boys belive we have found exactly where to start.

I am also happy to hear, that church I grew up in, the one full of backwards looks and “with us or against us” mentality, is learning. I hear it is growing once again after decades of being held together by a thread. People are catching on, love is spreading, and I hope to continue to hear good come from that little Light House on HWY 4.

read-the-signs.jpg


Oh No! Not the Transexuals!!!

Let me start by saying, I am in no way a political person. I do not have ties to any one group. I am merely a mother, who cares about her children and practices the use of common sense.

So, here are some common sense point I think many people are missing with this whole “Transgenders are in my bathroom!” media blow up.

  1. The new bill every one is referring to will NOT allow them to use the bathroom they see fit. It will STOP them from using the bathrooms they have deemed fit for themselves and have used all the years they have identified with their sex. This means you, yes you, have BEEN sharing a restroom with transgender people. Did it hurt you? No. Did you know? Not unless you are some form of pervert yourself. kevin-moore-bathroom-cartoo
  2. “Allowing them to use our bathrooms will open the door to predators”. This is my favorite point. Let’s elaborate on this. Predators are arrested in public restroom, they are caught dressed and acting exactly the sex they are, no lies, no costumes, no charade. No law is stopping them. “…but this will open the door!” Let me explain how this is not true. You believe that a man can dress like a woman and just walk in the ladies room. Ok, yes he can, but anybody dumb enough to fall for it needs more common sense. Any man going that far anyway, will do it regardless of law. That same man can walk into the mens room without playing pretend and feed on your son. This law if anything will increase the ease of entry for sexual predators… please read below…                  michael-cf791fc5b240877af0847a83a9b68a14
  3. This bill will make you MORE vulnerable to predators. The man you see above was born a woman. This law would require him to use the ladies room. Do you want that? NOT ME! My point however is, you see how much he looks like a man? With this new law any man, born man, looks man, acts man, can now enter the ladies room by claiming “I am a trans man, I was born a female. Law states I must use this facility” Ok he is doing EXACTLY what you’re asking. Only now you can’t argue without asking to see his genitals. You see how this makes it so much EASIER for predators?
  4. “…but men will dress like women now that they are aware they can to enter my bathroom!” There is a broad difference in a gay man, a transgender woman, and a cross dresser (there are many more in between also). A Trans woman lives her life as a women, she isn’t a guy who woke up one day and said “Today I want wear a dress and makeup”. It is a lifestyle change. It does not take science to figure out the real from the fake. After all, like I said, they have been doing it all this time without you realizing.
  5. You already share your dressing room openly with the opposite sex. While some stores do have separate dressing rooms, many do not. Wal-Mart, Target, Burlington, many major retailers (varies by location) do not have separate dressing room facilities. While some do have a clerk working them, many also do not. So the dressing room, the room in which you go to completely undress, is shared openly by the opposite sex. Where are your posters and pitch forks?27A3DBA700000578-3042240-image-m-80_1429207860484
  6. Trans women, and men, will be hurt and suffer. I don’t just mean “Oh, I’m so offended” I mean physically assaulted. See the lovely ladies in the photo above? They are born male. They are in a men’s restroom to show a point. Imagine one of these attractive ladies is forced to use the mens room. She stumbles into a bar bathroom where drunken men are now taking it, she is in pursuit of something more, or she is so drunk she doesn’t know the difference. This is a hot bed of sexual assault waiting to happen. Say this trans lady walks into a room of close minded homophobes and now they are faced with a room, where cameras are not permitted, with people looking to hurt them. Hate crime just waiting to happen. All these things are MUCH more likely to happen and WILL happen in much higher number than your whole “Men will will pretend to get into the ladies room” theory. (IMO)
  7. We are worried for our children. Yes I AM worried for my children. As stated above in #3, this law will put my children in MORE danger if it is passed in my state. Not so much as children because I will always escort them to the restroom until they are of an appropriate age to escort themselves, but as young men being followed by women, yes women are pedophiles and perverts too, into public restrooms under the facade that they were born male. I do not want my children to have to question the gender next to them. “If she wants to be a lady you treat her as such and you don’t pull your penis out at the urinal when she walks in. Why doest she use my bathroom? Well honey, because it makes other ladies uncomfortable. Crazy? Yes son, I know” This isn’t something I should have to explain to my boys.
  8. I can not support this bill because I am Christian. Jesus addressed the woman at the well, a public facility, and asked water of her. She was a loose woman of low morals. He did not agree with her life. He did not support her life decisions. He did not ask she take her unclean immoral bucket and hands to another well. He asked her for a drink, from her very own pail. Even when she asked him why he, somebody not like her, would want to share with her, he showed love, and in this, he showed her God’s divine plan. My God has plans for me. My life should be an example of what trust in him does. That stranger needing that ladies bathroom pep talk to boost her spirits (ya’ll know what I’m talking about) isn’t going to get it in the other bathroom.
  9. I just want to pee. They just want to pee. Let’s all pee. The average bathroom trip takes less than 2 minutes. Seems like a lot of noise about something so small. And like I’ve said several times already, WE HAVE BEEN DOING JUST FINE WITHOUT THIS NEW BILL.Screen Shot 2016-04-21 at 8.42.07 PM
  10. The one upside to this new bill? NEW JOBS!!! Every public restroom will require genital checkers. Not everyone has an i.d. and even so you can change your gender. So how do we stop them? A genital checker. Can’t wait for that job opening, bet you can’t wait to be required to prove your sex every time you go pee either huh? There goes all our dignity.

P.S. If you want to boycott Target you might as well boycott every public store, because as of right now, in my state and still in most, they are all still letting ’em choose wherever they want.

Honestly though, even if this does pass, it wont affect the true trans-population. They will continue to use the bathroom they identify with, you won’t know the difference, and life will go on just as it has before.

I’m Sorry Morning Child

I’m sorry little lover of the sun.

kastoneye

When you were created God looked down and said “Let’s throw this mother a curve ball”. First he sent me a lover of the night, fueled by the moon, sparked by the stars, and inspired by the silence of the dark. A more perfect rhythmic match could not have been created for me, than that of your brother.

Then he sent you. You await the sun’s grand entrance every morning like a long lost friend. I believe you mourn his departure each night by the sounds of  your troubled sleep. As he slowly lowers himself below the backyard tree line, you began to lose your sense of joy. I have considered moving us to a flattened desert wasteland to give you the absolute longest possible view of your precious sun. You gather your happiness from his rays and energize your body with his warmth.

Every night, after your life source has eased down and left us in darkness, you begin your transformation. Once night falls, you began to whine, cry, fight, rage. You become a hairless werewolf child no matter the phase of moon. While you cry yourself to sleep and await your precious sun, me and your brother come alive.

We dance around the kitchen. We become inspired to create art, tell stories, invent games. Magic comes to life once the dark falls and all things are possible. We soak up these fleeting moments of life, for after dark the most illogical of ideas become an attainable quest that must begin immediately. We stumble to bed when we have begun to run dry of inspiration. The soft blue glow though the windows tells us the hours of the inspired is over. We are eased into restful sleep and comfort in knowing we wasted no moonlight. The now brightening sky sedates us in a way no man made drug could imitate.

The sun creeps under the curtain, streams across the piles of laundry and toys, ascends the rungs of your crib waking you as quickly as it soothed us to sleep. You are up and my day must start. I am now a zombie, cursing the sun, cursing mornings, fumbling around for coffee, grumpy, resentful, drained. I am exhausted. I watch the clock for nap time counting minutes like a prisoner counting down the days of his sentence.

We repeat this every day. You awake full of joy; your brother and I shoot you daggers from red burning eyes. You are ready to play games, eat, function, live. We are missing our sun soaked bed. I tell you I’ll go to bed with you tonight, but I lie. I may try to follow your routine, but I lie awake in the dark while the moon continues to feed my mind lists of projects, chores, ideas, and questions until once again, the sun is rising.

I am sorry. I am sorry I will never know the joy of a good nights rest. I am sorry I will never awake and dive straight into games with you.  I am sorry you are alone in the elation that is sunrise. I am sorry I can not share in this joy with you. I am sorry you seem to miss all the excitement that takes place when the rest of the world is sleeping. I am sorry.

3-6pm…. That I can handle. Let’s make the most of it tomorrow. kastoneyes2

Kaston

I’m Married, but I Want a Boyfriend

Say you have a dress. You love this dress. you wear this dress as much as possible. You feel sexy, confident, happy, or maybe even just content in this dress. One day you notice a stain on the back. Now you only worry about this stain. How long has it been there unnoticed? You suddenly feel self conscious. You are no longer confident when you wear it because all you think about is that stain. It is amazing how when unnoticed, it was the best thing in your closet and now today you just let it stay on the hanger.

This just happened to my marriage.

My wonderful husband and I, after 3 LONG years without one, went on a date. For the first time since April of 2013 we went without kids to do something together. We are a very happy couple. I do not mean it in a cliche way when I say we truly are best friends. I think we are a perfect partnership. We argue very little, we laugh very often, and we have a healthy sex life, which is the key to a healthy marriage right? …Wrong.

Very shortly into this date, stains began to uncover themselves on the fabric of our marriage. We sat in silence for an awkwardly good bit of the hour drive. When we did speak, what did we talk about? Kids and bills. We discussed disciplinary areas that needed work, the current insurance claim on my totaled car, how we felt bad leaving his parents to handle our rambunctious little crew.

Once arriving at the the theatre (we saw Broadway’s Beauty and the Beast) the situation became even more obviously apparent. Our discussion once again fell to kids, how I couldn’t wait till the boys were big enough to appreciate the theatre. We even found ourselves looking for the best Belle inspired princess dress on one of the many little girls running around. Kids, kids, kids.

While standing in this exquisite and almost surreal theatre lobby the answer hit me hard. I watched two other couples near us, one stood very close, leaned into one another while talking to friends, another couple holding hands and snapping selfies, both with those ridiculously adorable puppy dog grins. The answer was right there; my husband was no longer my boyfriend.

That is not to say he is at any fault, as I am no longer his girlfriend either. I found myself standing next to a very attractive partner and friend. We are a team, Mommy and Daddy. We are business partners running a home for the Wicker bunch. We are friends who share interests and can keep the other one entertained and out of trouble. (Seriously, the only thing keeping us from being the perfect bro-mance couple is my lack of a penis.)

The stain was suddenly so vivid it could not be ignored. When I started the day I felt totally confident in my wonderful marriage, by the end I was completely taken aback by how we could let this “stain” go so long unnoticed.

On the ride home I tried to think of ways to act like a girlfriend but I was stumped. In the early years my girlfriend behavior was all just my reactions and responses to his boyfriend behavior, which I’m sure he feels the same about on his side. Luckily, on the ride, a friend had added us to a new very risqué Facebook group. We spent the ride checking out photos and laughing with one another, but before we knew it, we were back in the friend zone, laughing, discussing other people’s lives, being…. well… bros.

How did this go this long unnoticed?

Sex, that is how. Sex had become the big bow trying to cover the stain on our marriage. Of course the kids do occasionally nap, though its never for a very long period. In those rare short moments of being alone together we do one of two thing. 1. Sleep 2. Have sex.

Sex after kids is always rushed or extra quite and sneaky.  It is almost job like, not to say it isn’t a pleasant experience, it’s just less build up. There is no time for playful banter, flirting, build up. It is “take it while you can!”. Because every second we were ever alone was spent trying to fill it with physical pleasure, once we were alone and sex was no longer an option, we didn’t know what to do.

Sex was not an option on this date night for reasons of a personal nature, so even the flirting and little innuendos of “I can’t wait to get you home”, were taken off the table. That left us naked and exposed to only each other’s company. Since this date night last week it has been a festering stain. What was once my favorite “dress” turned out to be my comfiest pajamas in disguise.

Yes, I am comfortable. Yes, we have fun. Yes, I am happy. Am I satisfied? Not even close. I want a boyfriend. I want to be a girlfriend. I have the perfect man for the job, but how do you date somebody you already know everything about? How do you rekindle the spark in what has become your dearest friendship? How do you step out of Mommy and Daddy an into lovers again? More importantly, how do you do this with kids always present?

I just want to be his girlfriend again….. and I will be.

***UPDATE*** How this Married Woman got her Boyfriend Back

12310697_1032444380110877_8698023197903680160_n

My Best Friend, husband, partner, and soon-to-be boyfriend.


DIY Phone Case (Under $3)

DIYPhoneCaseicon

Step 1. Purchase a clear case to fit your phone model. They are available for $2 all over Amazon.com. Can’t beat that. One case will work for multiple designs though, so you only need one.

DIYPhoneCase7

Step 2. Find an image you like and print. Here, you can use trial and error to print the size you like or to save ink I opened the image I wanted in adobe reader as a pdf. There you can see the image in the exact size on screen as it will print on paper. I held my clear case to the screen until the size was what I wanted.

DIYPhoneCase2

Step 3: Lay case over the image, as you want it to look on the phone and trace around it. Cut the image out by cutting ever so slightly INSIDE the trace line.

Step 4: Carefully put image into case. You may have to cut away very small edges at a time to adjust to case. You do want some of the paper to fold over the phone edge though so precision isn’t a big deal. Once on, use a box cutter or x-acto knife to cut out the camera slot. (Do this with the paper side up. It is much easier that way)

Step 5: Put it on your phone! Voila! You can change it as often as you want. Use photos of family, let your kids draw on pre-cut phone templates, use a pic from a magazine, anything paper!

DIYPhoneCase1

(((I made two thus the difference in finished product and tutorial pics. I decided I wanted more Belle and more colors after I finished the first one.)))

I’m Never Leaving the House Again… with Kids

I go to the post office at least once a week. I do not like it. I do not look forward to it. My printer is broken so I have no option to ship from home, plus some things I would have to lug into there anyway. My husband, and even friends, never seem to understand the disdain in my voice when I say “Post office” so let me elaborate.

Here is the events of today’s “quick run” to our local post office.

Get up round 9, remember I HAVE to get some things shipped TODAY. Start dressing myself and kids.

Three_hours_later

I finally have tire aired up, bottle washed, kids in clothes and shoes, packages together, dogs taken out, carseats put back in the car,  and I at least have a bra on so I can say I’m dressed.

Kaston screams for the majority of our 7 minute drive.

We arrive. Paxton decides he is “stuck” to his carseat. I have to pry him out with magic while holding fatty Kaston. He has to wait for the “magic” automated doors to close so he can open them himself “magically”

Line is backed up, no problem, I need to grab a shipping envelope and label some stuff anyway. Grab what I need, no pen. No pen in the entire post office other than the ones at each teller station which are ALL full. Lord forbid you dare try to fill out anything that close next to someone checking out. People don’t want you to see them shipping socks to their grandmother or returning their overpriced shoes to the seller.

I shove my unpackaged stuff into the shipping envelope and wait. Kaston decides he needs to grab every pile of forms off the counter. 15 minutes of fighting him later Paxton decides he HAS to pee. I try in vain to get a tellers attention, I finally shout out to nearest worker “I need a potty! Kid has to go now!” She then tells me “No, sorry, we can’t let you go here” before scurrying off to the back again

What did she just say to me? MY 4 year old can’t go HERE? I have seen people allowed to use the restroom multiple times. Do they not realize I’m here all the time. I yell back to her across the room of people, “That’s fine, he’d rather pee in your parking lot anyway”

So I leave my packages on the counter and escort him outside. Once situated between my 2 open car doors he decides he doesn’t have to pee after all. False alarm.

I’m irritated to say the least. I go back in expecting the people within to have the common courtesy to let me back in my place in line, if not that then at least take pity on me. It is beyond obvious I have my hands full. Keep in mind I have Kaston’s hefty butt on my hip this entire time.

What sorcery is this? It is literally an entirely different line of people!? What happened in the 5 minutes that I was gone to move the line ahead by 10 freaking people? I waited 15 minutes and only 4 people went through!? Of course nobody cares whether they may have seen me ahead of them earlier, so it’s to the back I go…again.

At this point, Kaston, who hasn’t had spit up issues in weeks, begins spurting spit up like a garden hose. It’s all over him, me, and the counter. I find ONE single wipe in my purse and clean him and the counter best I can. I have’t even shoved the sopping cloth back into my purse before he lets out another wave, This time I manage to catch two heaping handfuls in both hands. I am looking around frantic for any sign of a paper towel. Nothing. I know I can’t even walk to the counter and ask without spilling this everywhere. I am precariously balancing him on my hip and it just won’t work. I have no choice but to say “screw it” and rub what looks like over a cup of warm spit up all down my shirt and pants legs.

During this battle, Paxton has disappeared from my side. I see him attempting to hide behind the card rack. This can only mean one thing; he is about to crap himself. I hurry him back to my side in hopes he can make it just a little longer. We wait another 20 minutes.

The teller finally calls us up, at the precise moment Kaston decided he doesn’t want to be held anymore. Crazy considering he NEVER wants to be put down when we are at home. He has started to go into that wild buck kids do. I’m flipping and switching him every which away while trying to fill out my labels, since I finally have the privilege of a pen. I attempt to sit him on the counter while I dig out my wallet, he wildly grabs at everything. knocking things over in the process. I put him back on my hip. Teller hands me ANOTHER form to fill out and asks me to fill it out to the side. This means I will have to wait AGAIN.

All the while I am trying to keep my eye on Paxton, who is pouting that I made him stand beside me. I notice he has stopped whining which means he is probably trying to poop again. Yep, pretty sure I smell it.

We finally make our exit nearly 40 minutes after arriving. I rush to the nearest drive thru to feed Paxton and pray they have coffee. Taco Bell is the closest thing. No kids menu so of course he is now crying because he didn’t get a toy with his food. My coffee tastes like the beans went through a donkey’s lower intestine before they made it into my cup. $1.79 wasted.

Kaston screams, yet again because he is strapped into his torture device of safety. He manages to fall asleep in the last 30 seconds of our ride home.

I wake him to unload, so he is screaming again. I throw Paxton on the potty to finish his crap. He is now crying and whining because he hates it. I grab Kaston back up and try to calm him back to sleep. He isn’t having it. It takes every song I know and 15 minutes of rocking to get him to stop crying. At the precise moment he stops crying, Paxton yells that he is finished.

Great…. I can’t leave him just sitting on the toilet 15-20 minutes with a crappy butt while I get this one to sleep, but if I put this one down he will start to cry again and I will have to calm him all over again. I choose the latter. No sooner has his butt hit the crib mattress, he is in tears again. I rush to wipe butt as fast as humanly possible and try not to cry.

It isn’t even 1:00 yet. Can I go back to bed.

images

Yes I am aware of the atrocious grammatical and punctual errors…. my kids are yelling again… “Ain’t nobody got time for dat proofreading!”

Beginner’s Cross Body Hip Bag Tutorial

While looking For a project to use my “cute ugly” fabric on, I decided I not only wanted but needed a shoulder bag for running in and out with my kids. I currently tote a big ole back pack full of everything I could possible need to survive a nuclear attack.

Problem was, I couldn’t find anything but pdf patterns, usually at a steep price also. My printer is currently on deaths door which means pdf is out of the question. So I looked at a few pictures and decided to wing it. I have outlines every detail and I assure you this is a beginner project! I am a beginner myself.

Cross-carry bag

You need: 1/2 yard Main Fabric

1/2 yard lining/complementing fabric

1/3 yard fusible interfacing

2 med-large metal rings

2 small metal rings (optional for adjustable strap)

THATS ONE YARD OF FABRIC!!! Hells yeah!

No pattern needed, just the following square and rectangle cuts:

Main Fabric

(2) 10″x 12″

(2) 12″x 3.5″

(2) 3.5″x 8″

(1) 10″x 10″

(1) 10″x 6.5″

(1) 10″x 3.5″

Lining Fabric

(2) 10″x 12″

(2) 12″x 3.5″

(2) 3.5″x 8″

(1) 10″x 10″

(1) 10″x 8.5″

(1) 10″ x 3.5″

Interfacing

(2) 10″x 12″

(1) 10″x 10″

I use old newspapers to draw and cut my squares and rectangles to use as patterns, much easier than retracing every shape.

Keep ALL scraps!!!

Should look something like this.

Satchel Tutorial

Firstly attach your fusible interfacing to the 10″x 10″ and both 12″x 10″ pieces of lining fabric

lining

 Round the corners of both your 10″x 10″ squares like so…

20150204_220845

You can do this by putting them together then folding in half. If you are not confident in your free cut, trace a cup or lid to get a perfect rounded guide line.

20150204_220913

Now, place both pieces right sides together. Sew along both sides and around curved ends, leaving the straight side opposite your curved edged open. snip notches into the curve of the fabric to prevent bunching. Be careful not to cut your seam.

20150204_235012

Flip right side out, press, and sew a 1/4″ seam along the edge. Should look similar this when finished. Set aside for now.

20150204_235304

20150204_235310

Using both the 10″x 6.5″ main fabric and the 10″x 8.5″ lining fabric, fold one of the longest edges down 1/4″ and press. Turn again 1/4″ and press again creating a concealed edge. Sew along this edge to create the finished edge of your pockets.

(I used pockets 2″ shorter than what is suggested here, Mine were a tad more shallow than I had hoped for originally)

20150204_221603

Now stack your pockets onto you front right side of your panel (10″x 12″), the way you wish for them to be seen from the outside, hemmed sides on top. (Note: your pockets should look slightly taller. I added 2″ to this tutorial)

20150204_222128

Using your two 12″x 3.5″ Lining fabrics, place and pin them right sides together onto both sides of your front panel.

20150204_222150

Sew along the 12″ edges straight down, being sure to sew over the pocket edges also. Open and press open seam.

20150204_222551

using your 10″x 3.5″ Lining piece, place and pin it right sides together across the bottom front panel, Just like the two pieces before. Sew across, being sure to sew through the bottom of the pockets also. Open and press seam.

20150204_222919

Here it gets tricky. You are going to sew together the ends of the lining pieces to form a corner. I wish there were a better way to show you but really, just line them up, straight raw edge to straight raw edge.

20150204_223255

20150204_223337

When both are done should look something like…

20150204_223355

Now, grab all your pins. Use the remaining 12″ x10″ main fabric piece and begin to pin it to all the lining fabric sides on the back (right sides together), creating a bag. Start at bottom corners for best results.

20150204_231635

Sew, press, and flip right side out. To save you time and frustration later, press the top raw edges down about 1/2″, do not sew them yet though.

20150204_232441

20150204_232449

Repeat all these step (without pockets) to create your lining. When finished you should have 2 complimenting bag shapes. Fold and press raw edge of lining bag 1/2″ also. Do not sew.

20150204_234430

Locate your flap piece with the rounded corners. Now pin your flap to the back inside of your outer shell about 1/2″. Raw edge should be folded down so from the outside there will be no raw edge visible. Sew.

20150204_235635

Flip your lining bag inside out and insert into outer bag, so you have right sides visible looking in and out, set aside.

Using your 3.”x 8″ pieces, lay complimenting fabrics right sides together. Stitch completely down both long sides, flip right side out and press. Here is one sewn and one flipped right side out. You should have 2 when complete. These will be your hooks for your metal rings.

20150205_001149

loop each piece around one of your metal rings. Sandwich the ends in between the lining and outer shell of your bag along your 3″ sides, inserting ends at least 1″-2″ into the seam. Pin

20150205_001905

Continue pinning around the entire mouth of bag. With raw edges folded under. Sew a 1/4″ seam around the entire top. Be sure to sew a few extra stitches on both sides with the metal rings. They will be weight bearing seams so reinforce them.

20150205_001959

When finished should look something like…

20150205_002817

Now for straps. I did not manage to get pictures but there are several way to do this. I cut all my remaining scraps into 3″ strips. I then sewed them all together in a continuous strip, being sure to reinforce each seam with a zig-zag stitch. After I had one long strip of fabric (1.5 yards) I folded my strip in half, right sides together, and sewed straight down.

Then using a safety pin, fed one end through the looong tube pulling it right side out. Press.

You could also use one continuous strip of fabric if you have it, or use nylon strapping.

To attach to your metal rings you have 2 options. One being the most simple, by choosing a set strap length and sewing it directly around the loop on both sides. Be sure to fold your raw edge under.

MbC1

To make an adjustable strap, FIRST attach one end of the strap to your 2 smaller rings

MbC2

Then loop your raw end thru one big ring and into the smaller rings much like a belt. Pull all the way to the opposite larger ring and sew like in first drawing above. you should have double strap on one side like so…

20150205_134100

Attached to larger rings like so…

20150205_134107

Once That’s done, ENJOY YOUR BAG!

20150205_134807

Note: You can add snaps or velcro. I didn’t have any handy for this project but I prefer the flip and grab. My current bag has a magnetic snap and I want to chunk it every time I try to snap it while wrestling kids though a parking lot.. Like looking for a contact in a blizzard. Will probably go with velcro if I make another though.

Easier, Cheaper, Quicker Photo to Canvas Transfer

I have seen lots and lots and lots of photo to canvas transfers. The majority of these transfers call for a gel medium which runs about $13…. NOPE! It also calls for 12 hours of drying. “Ain’t nobody got time for dat”

So here is my version that was muuuch cheaper! It also makes creating a more vivid picture easier without as much peeling and tearing.

Supplies:

Printed image from laser jet printer

Canvas to fit printed image

White acrylic paint

Modge Podge

Olive or vegetable oil.

Blow Dryer (optional)

Cost:

To print $0.10

Paint $0.30

Modge Podge $0.10

Vegetable oil $0.05

Canvas $1.00 (9 pack for $9)

Total: $1.55 per canvas photo

Now here is how you do it!

1454753_670002496355069_1262572445_n

Step 1: Print you image. Be sure to flip it the opposite of how you want it to look as you will be transferring it face down. Paint your entire canvas with one good coat of white acrylic paint. Be sure to paint the entire surface. Allow to dry. You can use a blow dryer to speed up this process or it will dry on it’s own within 15-30 minutes depending on how thick the paint is.

1453267_670002436355075_175558186_n

Step 2: Cover entire surface in modge podge.

1469915_670002383021747_485661876_n

Step 3: Place photo face down onto canvas and smooth out all bubbles. Try to create as little wrinkles and bubbles as possible. Allow to dry. This can be sped up with a blow dryer also. Without a dryer allow 20-40 minutes to dry.

(This is a great project to work on while cleaning the house or preparing supper)

1459669_670002323021753_472413233_n

Step 4: Spray the now dried paper with water. This works best if you work in sections instead of soaking the entire canvas. I used a spritz bottle with water. You can also use a wet sponge or wet rag….

1470152_670002286355090_970270388_n 1470128_670002019688450_553861191_n

…Begin rubbing with your finger. layers of paper will start to peel away. Be very careful in this process. Peel one layer at a time away. It will look vivid when wet but as the water dries it will look more white again. I will show you how to fix that.

The more layers you remove the more vivid the photo becomes but on the same hand the more layers you remove the more apt it is to tear and leave a hole in the photo. So one or 2 layers is plenty! Don’t over do your rubbing!

1463921_670001933021792_1640355862_n

Once completely peeled it will still have a hazy white over it, let it dry, only takes a few minutes or use the blow dryer. Then use a dry rag or paint brush to brush off loose pieces of paper lint.

1450748_670001663021819_340179466_n

Step 5: Grab that vegetable or olive oil….

1471152_670001643021821_1254199467_n

… pour onto canvas and use a soft cloth or brush to spread the oil over the canvas.

1477457_670001609688491_1938556085_n

the oil will soak into the paper and make the colors stand out much like the water did. Only the oil will not dry up! Allow the oil about 1-2 minutes to saturate the thin layer of paper.

1466212_670001556355163_140893697_n

Step 6: After oil has had a couple minutes to saturate go over the entire canvas with modge podge. The modge podge will mix with the oil but don’t worry. It will still dry and the oil will still stay within the paper/canvas.

You can use a paint brush to create paint strokes in the modge podge for a faux painting if you wish.

Then allow 30-40 minutes to dry. The surface my still have a slight greasy feeling after it dries but I have had my others on the walls for a few months and they are completely dry and touchable.

I have not hung This one yet but here is his sisters photo’s. A couple of them transferred so flawlessly I had to purposely rip pieces away for the raw look I was going for.

1463976_670001433021842_1638851899_n

I painted the edges of the canvases after transferring but that is a personal choice. Completely optional.

So there you have a easier way to create these beautiful pieces of art!


Copper Top Penny Coffee Table DIY

This table…(shakes head) … this table, it belonged to my husband’s Nana which translates into, “We are never getting rid of it” I’ve had tried numerous time to get a new coffee table and have been met with a “No” from Jerry. It was a regular brown coffee table when we got together. I thought it had met it’s demise a few years back when my husband and a friend crashed into it. Wrong!, Jerry screwed it right back together. So, since we can’t let it go, at least we can make it more unique.

coffeetable

All you need for this project is:

a Surface (coffee table in this case)

Elmer’s Pro bond advanced or equivalent, must bond metal to wood

Martha Stewart Copper Metallic Glaze or equivalent, an acrylic copper will work as well.

Black spray paint your choice of gloss or flat

Polyurethane clear gloss

Pennies, pennies, pennies!!! 

Just to go ahead and warn you, you are going to need more pennies than you think. I chose this project because I assumed “Oh! pennies! how cheap this will be!” After my first visit to the bank for $5 in pennies I discovered I was wrong. In all, I estimate $15 in pennies. Not my cup of tea AT ALL!!!

This project in all including paint, pennies, and polyurethane I estimate at around $25. Still cheaper than a new table. I was given the Martha Stewart paint by my sister so FREE! Already had the Elmer’s on hand as well.

933979_621025961252723_1580269495_n 1016136_621025944586058_988103384_n

This is what we started with. I painted the table a sherbet orange a year or so ago. This was after a slight sanding.

548355_621026001252719_1006849231_n

Step 1: Paint entire piece your base color; I chose black. Let dry

d6ab7863-55b7-4232-82f8-5ba8e285eb20_300

Step 2: using you glaze or equivalent, cover whatever surface your placing your pennies. This will make it look like a more cohesive piece. The gaps in between will not stand out as much. Also if your working with an odd shape like I was, this will make your edges look much more uniform.

1097999_621026061252713_1334203752_n 1237880_621026024586050_578979066_n

I used an old blush brush to make swirly patterns. Almost left it like this; was very pretty. I just wanted some texture in my life though, so I continued.

1236276_621026087919377_1898837237_n

Step 3: using the Elmer’s advanced bond start placing your pennies in a stagger pattern for maximum coverage. If you are working with a odd shape, like this table, it will be your call on how far to let pennies overhang. Some rows will line up perfectly with the edge while others will have a gap or leave your penny hanging over. Totally up to you what you do with it. This is the reason I applied the copper. The copper base makes these edge gaps less noticeable.

532096_621026181252701_380148038_n

My completely filled table. 15 stinking dollars later! Don’t fret, Gluing them down is much quicker than you think, even a little fun.

1149076_621026204586032_1776176744_n

Step 4: You want to apply this for numerous reasons. It will protect the pennies from turning colors, avoid them coming off the table from wear, and seal the cracks for easy cleaning. To apply, literally pour the contents of the can into the center of the table. Using a wide paint brush or sponge, work the coat outward to the edges. You may need more or less to completely fill the cracks for a smooth surface area. For a very smooth finish, buy 2 cans. Repeat this step again after table had completely dried with second can of polyurethane.

This will take anywhere from 24-48 hours to dry. I left mine outside for the first 36 hours. The nearly drowning humidity kept it from drying completely so I had to confine it to a bedroom away from toddler hands overnight to finish the drying process. Seriously though, the humidity here is so bad you almost need scuba gear to breathe in the yard.

1151033_621026271252692_1332657164_n

Step 5: Enjoy table! Mine will get an extra coat of polyurethane I’m sure eventually. I LOVE the wet look it gives it!

14137_621026311252688_1971559887_n

Isn’t it lovely?

1240583_621026231252696_1154744203_n

Paxton saw the camera and waned to “cheese” for Mama.

BONUS!!!

598480_621026347919351_1098027257_n

Add pennies in any pattern to a cheap piece of dollar store glass. I think they sell them for candle stands. Got this one for $0.25. It’s a new coaster for my fancy table.

Enjoy!